Build detail
A build’s page is your slot-by-slot workshop bench: for every position on the board you choose the exact part to install, mark it done, jot mods in Markdown, add photos, and track progress — then optionally publish it to the gallery. (Shown: an in-progress Soft Clipper, 8 of 14 slots filled.)
The build bench
Identity and notes up top; the per-slot Parts List does the work.
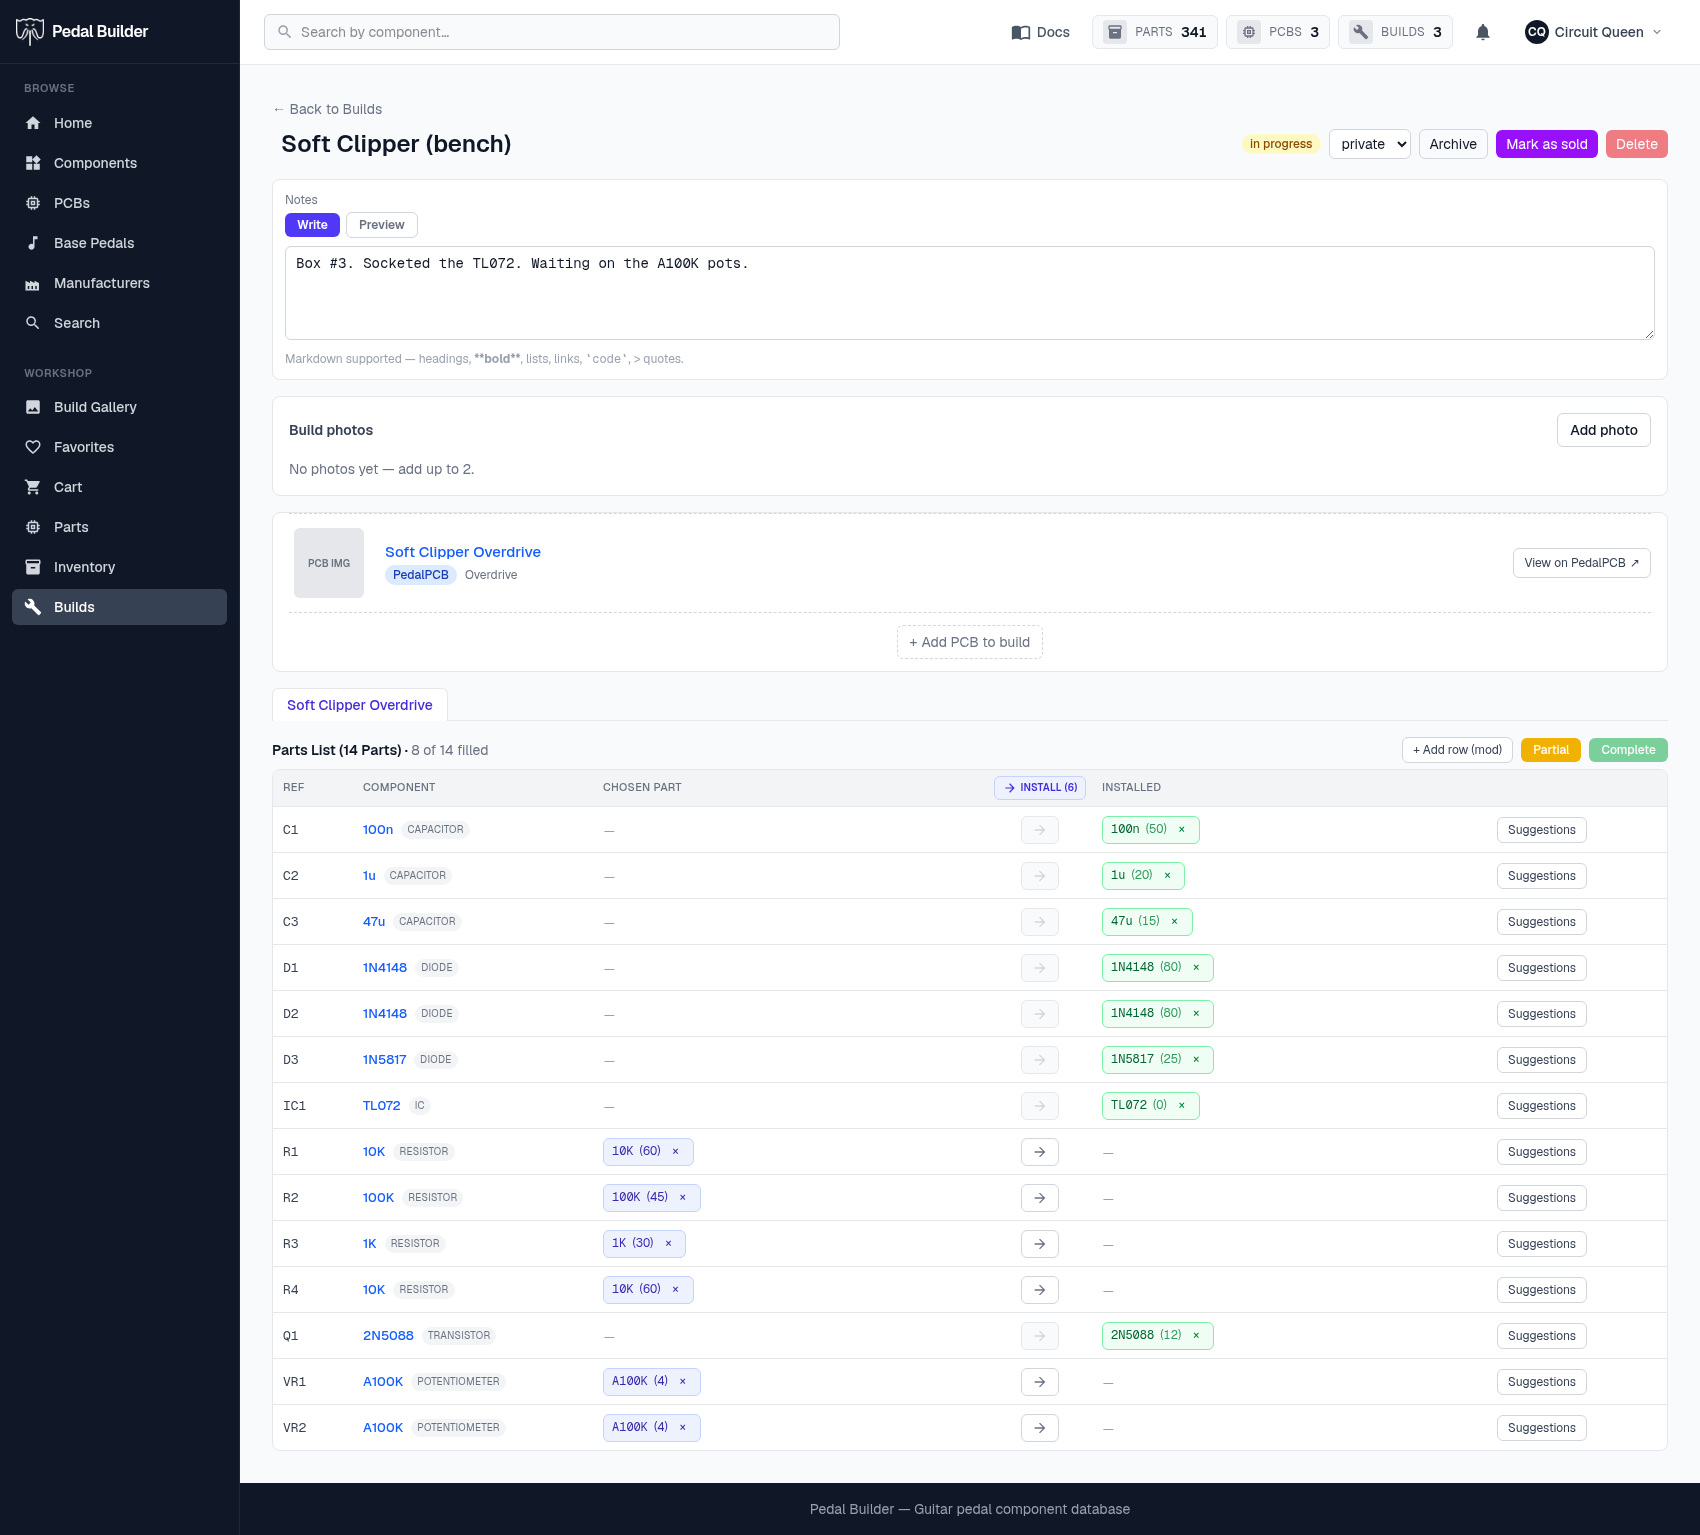
- 1Name — Rename the build inline. The title falls back to the PCB name until you set one.
- 2Status & sharing — The lifecycle badge, a visibility control (private vs public — public publishes it to the Build Gallery), and Archive / Mark-sold / Delete.
- 3Builder’s notes — A Markdown write-up (Write / Preview) that travels with the build everywhere it’s shown.
- 4Build photos — Upload up to two photos, remove them, and pick which is the cover; a build with none shows a placeholder.
- 5Your PCB(s) — The boards in this build. “+ Add PCB to build” adds another instance; each board gets its own Parts List tab with an “X of N filled” count.
- 6Fill each slot — For every BOM reference: the Component is fixed by the board, but you choose the exact Part to install. Pick a Chosen part, click → to install it (it decrements inventory), and it moves to the green Installed column. “Save as Partial / Complete” sets the board’s status.
- 7Suggestions — Proposes parts for the slot — what’s already filling it, alternatives that satisfy the component, substitutes, and same-type parts — flagging which you have in stock.
Good to know
- Premium feature; this is your private working view. Setting visibility to Public exposes a read-only profile in the gallery (see “A shared build”).
Tips
- Picking parts from Suggestions pulls from your inventory, so a well-stocked inventory makes filling slots fast.